How to View
The ability to view 3D SBS images (side-by-side, parallel views and cross-views) without the aid of glasses is a nice skill to have, and it can be mastered easily by most people. Several methods are described below to help you learn to "free-view" both cross-eyed and parallel stereo views.
The cross-view technique is generally easier to master and should be tried first.
Then, give the parallel method a try. Parallel is the method most often used in stereograms (stereo cards), such as those which were so popular from the Civil War period up until the mid-1900's.
Cross-View
First, let's try cross-view. Cross-views or X-views are displayed with the image for the right eye at the left and the image for the left eye at the right. In order to view these, you must cross your eyes such that the right eye looks at the left image and vice-versa. The training technique is quite simple.
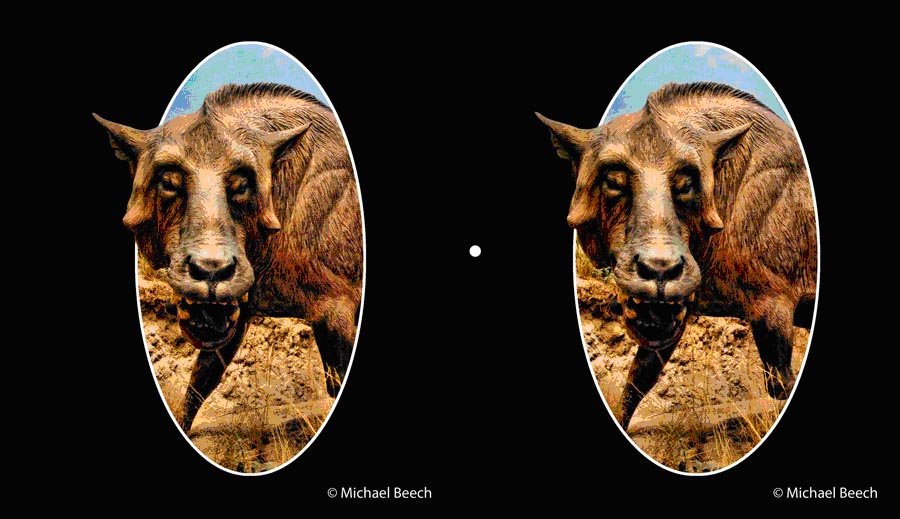
Using this image, we'll try the quick method first . . .
While looking near the center of the black rectangle (near the white dot between the images), slowly cross your eyes and watch the images move toward each other. When they overlap exactly, they will merge into a 3D image. Tip: Be careful not to tilt your head to one side or one image will seem to be higher than the other. If you use glasses, you should be looking through the part of the glasses that keeps the screen in focus for you.
"What is that thing?!" I hear you ask.
Dinohyus was a pig-like, carnivorous entelodont that lived on the Nebraska plains a mere 20 million years ago. It was the size of a moose--really--and its skull was over 3 feet (1 meter) long. I found it wandering the halls of the Denver Museum of Nature and Science.
If you are still having trouble, try this:
Again, look at the white dot at the center of the black rectangle. While keeping your eyes looking at the dot, hold up a pointer, such as a pencil or your finger tip, between you and the stereo pair. There will seem to be two ghost images of the pointer. Don't look at the pointer . . . keep your eyes on the dot. Move the pointer toward you or away until the ghost pointer's tips seem to be centered in each of the images. Keep the tips of the ghost pointers level by slightly tilting your head to the left or right. Once you have a ghost of the pointer tip centered in each image, look at the pointer tip. You will see that a 3D image has appeared behind the pointer. Now you can move the pointer out of the way.
A slight variation of that technique is to start with your pointer tip near the screen and right on top of the white dot. Without taking your eyes off of the white dot, move the pointer toward you. You will see the pointer seem to become two pointers. Keep your eyes focused on the white dot, but manuever the two pointer tips until you have one centered in each image. Look at the pointer tip and a 3D image will appear behind it. Move the pointer out of the way.
After a bit of practice you will be able to look at a cross-view stereo pair and cross your eyes to quickly fuse the two images into 3D with very little effort.
Parallel Free-Viewing
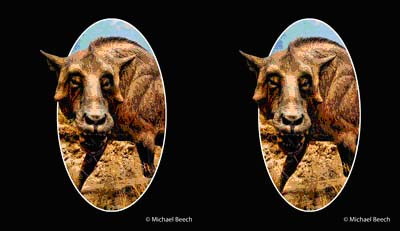
Now, let's try to parallel free-view. This may seem harder, but it is actually pretty easy once you understand what you are trying to do. First, you will note that the image provided is smaller. This is because it is hard for most people to separate their sight-lines wider than the distance between their pupils. For this reason, the first sample image is very small. For this to work, the image size should be between 2 and 3 inches (5cm to 7cm) wide. Change your screen, if necessary, to get it to be that size. If you use corrective lenses, you should be looking through the part of your glasses that keeps the screen in focus.
Keep in mind that your goal is to try to allow the sight lines of your eyes to diverge slightly as if you were tired. Try that on this image.
Don’t give up yet
Find a piece of cardboard that is about 12 inches (30cm) long, such as a the back of a yellow scratch pad. Place the cardboard vertical to the screen so that it divides the black rectangle in half with one image on the left side and one image on the right. It should be sticking straight out from the screen. Place your nose against the edge of the cardboard so that your right eye can see only the right image and your left eye can see only the left image. Just relax your eyes and let them do their thing. The images may wander around for a moment, but eyes automatically try to fuse similar objects together and, if you give them a moment, they'll get it right. In fact, you won't even be able to stop them from fusing the image into 3D. start with the small image. Then, if the small one works for you, try the larger ones for practice.

Just one more way
Another method to learn this skill is this: print the previous image onto a piece of photo paper (so it will be fairly stiff). Trim off the top of the paper exactly at the top of the image. Hold the stereo pair at arm's length and look just barely over the top at some distant object (at least across the room). While looking at the distant object you will see that the two images have begun to merge together. Move the print upward into your line of vision while continuing to gaze into the distance and you should see the 3D image fuse and form.
Sometimes a larger image will work better for this technique, so print the large image out as well, but don't make it wider than 5 inches (12.5cm).

If you weren’t successful, keep trying . . . you can do it
I hope this exercise has been helpful and successful for you. If not, don't be discouraged; you can always use a parallel viewing aid, such as a Holmes stereoscope, a Screencope or a plastic lorgnette (was $3.95 at http://www.3dstereo.com/) to view parallel stereo images and cards. If you were successful, you can try your new skills on the images in the Parallel View 3D Gallery and the Cross-View 3D Gallery.
Good luck in your stereo viewing and best wishes,
Mike Beech